Creating a Home Page
Creating a basic custom home page versus creating a dashboard style home page.
Creating a Basic Home Page
After editing your group settings your home page will have a left menu with 3 tabs: Home, Forums, and Files.
 Video example
The content area of your home page will include the mission statement and an activity stream (a dynamic listing of content as it is added to the group). Many times groups do not want the activity stream on their home page. In order to remove it you will need to set up a custom home page.
Once you have created the new home page you can customize the content.
Creating a Dashboard-Style Home Page
After creating a basic home page for your group, you may want to change the layout to accommodate more features.
View a video example for creating a Dashboard Home Page
 Video example
For instructions on how to add widgets and custom content to your dashboard-style home page see page adding widgets to your panel page and adding "custom" content page. Adding slides to your slideshow widget is covered in the next tutoral section "Adding a Spotlight Slideshow". See the widget reference table for further description of available widgets.
View a video example for adding news, events and spotlight slideshow widgets to your Dashboard Home Page
 Video example
Adding A Spotlight Slideshow
You might want to add a slideshow to your home page.
 Video example
 |
You will first need to add the Spotlight widget. Click the "Edit content" link. |
 |
You will be taken to a page that shows the regions of your panel page. Click on the gear icon in the upper left corner of a region. |
 |
Then select "Add content" from the dropdown menu. |
 |
This will take you to a page where you can add widgets and custom content (for more detail see pages adding custom content and Widgets Table).
Click "Widgets, group dashboard" in the left side menu. Then select "Spotlight [group]" from the available widgets.
|
 |
Change the Spotlight title if desired, then click "Finish" to set your changes. |
 |
Step 5: After adding widgets, click "Save" to take you back to your panel pages list. |
Adding Content to the Spotlight Slideshow
Only group Managers, Moderators, and Members who have been granted the 'Trusted User' status have permissions to add content to the group spotlight slideshow.
 |
After creating an “Event” or “News item", scroll down to the area that is titled “Slideshow Image”. Click the “Choose File” button to retrieve an image from your computer. Click the “Upload” button to upload the image. |
 |
If your upload is successful, the image will display next to a button giving you the option to “Remove” it.
|
How to add content to your spotlight slideshow (usually found on the group home page).
 |
If you want the slideshow image and title to link to something other than the node URL (default), enter a custom "slideshow link" to make the spotlight link to a custom page with the setting below. Checkmark "Open URL in a New Window" if you want the browser to launch a new window upon click. If it's an external link, it needs to be a fully qualified URL, ie. http://www.somesite.com If it's internal, it should be sufficient to put a relative URL, ie. node/1234. |
 |
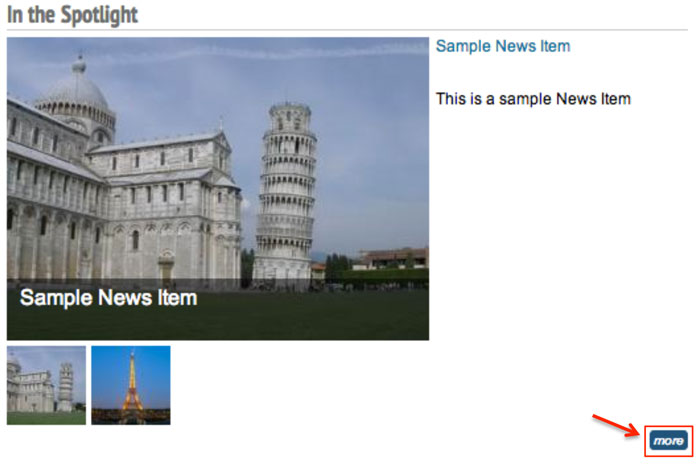
There is also a "more" button at the bottom right of the slideshow that links directly to the CPS-VO news item or event rather than the custom link. |
 |
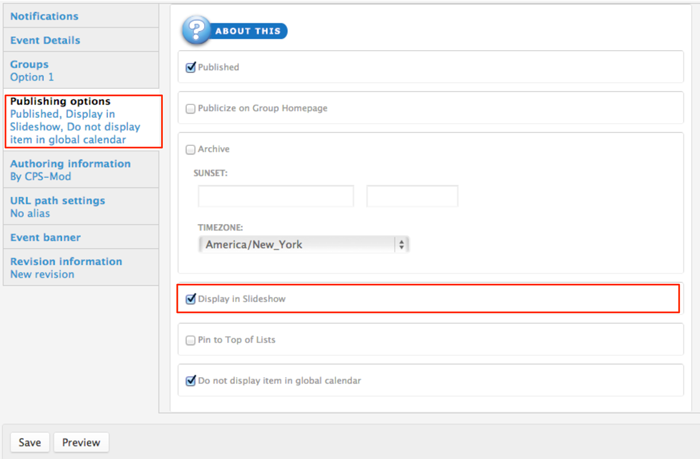
Next, click on the gray tab titled “Publishing options” and checkmark the box next to “Display in Slideshow”. Click "Save" to publish your event and show it in the spotlight. |
About Publishing Options
- Publish: Uncheck this option if you don't wish for this content to appear on the VO yet. Useful for saving drafts of content that requires editing before going live/published.
- Publicize on Group Homepage: This option will place your post on your group's homepage in the corresponding section (Recent News, Upcoming Events, etc…)
- Archive: Will remove this post from displaying publicly (or to members of your group) and add it to a historical archive listing. You may also want to type in a date and time in the “Sunset” section to control when your event or news item is automatically archived.
- Display in Slideshow: Will place this post, along with its image (or video), in a slideshow. Must be used with either Publicize to Entire VO or Publicize on Group Homepage options.
- Pin to Top of Lists: This option will make this post appear at the top of content listings, regardless of any other settings. Useful for denoting important content or content that has a "call to action" associated with it.
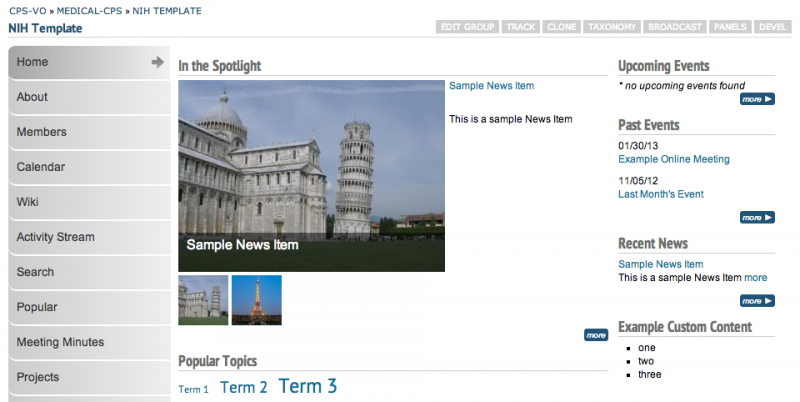
After adding content to your slide show you can expect to see something like the example below.


