
 Running hector_slam with the CAT Vehicle
The goal of this tutorial is to demonstrate how to run a SLAM instance as part of the simulation.
Overview
Simultaneous Localization And Mapping (SLAM) enables moving robots to use beacons detected by their sensors as means to estimate their motion: in addition, the locations of these beacons are remembered in order to build a map of beacons seen, which aids in estimation as these beacons are later encountered.
Installation of additional packages
If you did not already install the hector slam packages, review the Installation page.
Starting up the Simulation
In order to use SLAM, we need a consistent set of beacons. I recommend using an environment with objects along a perimeter, such as the Canyon View simulated field.
roslaunch catvehicle catvehicle_canyonview.launchVisualizing the data from sensors
At the beginning of the tutorial, I recommend you start up gzclient in order to see the kinds of obstacles that are in this tutorial:
gzclient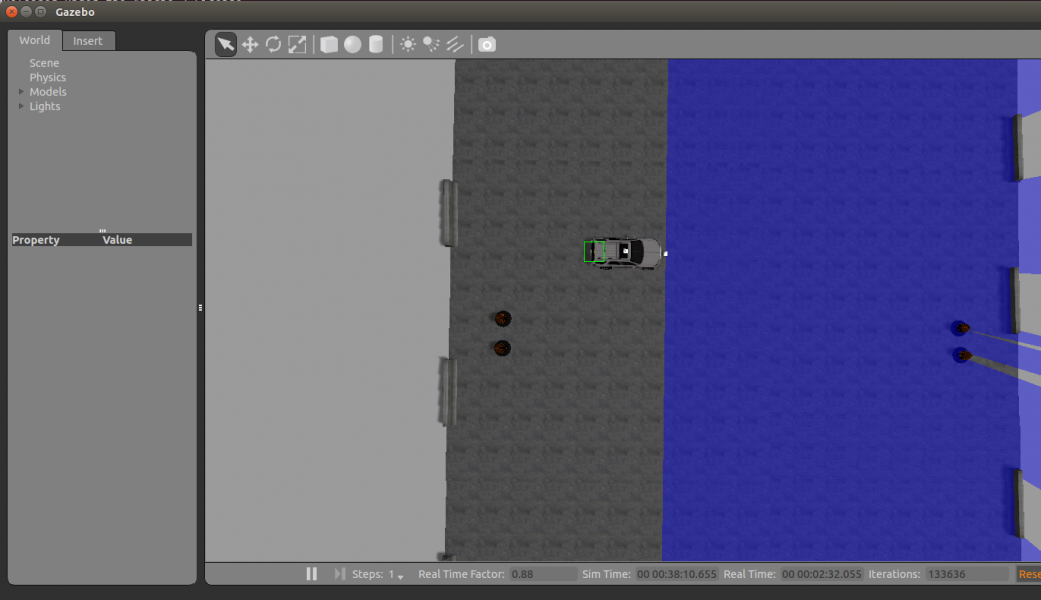
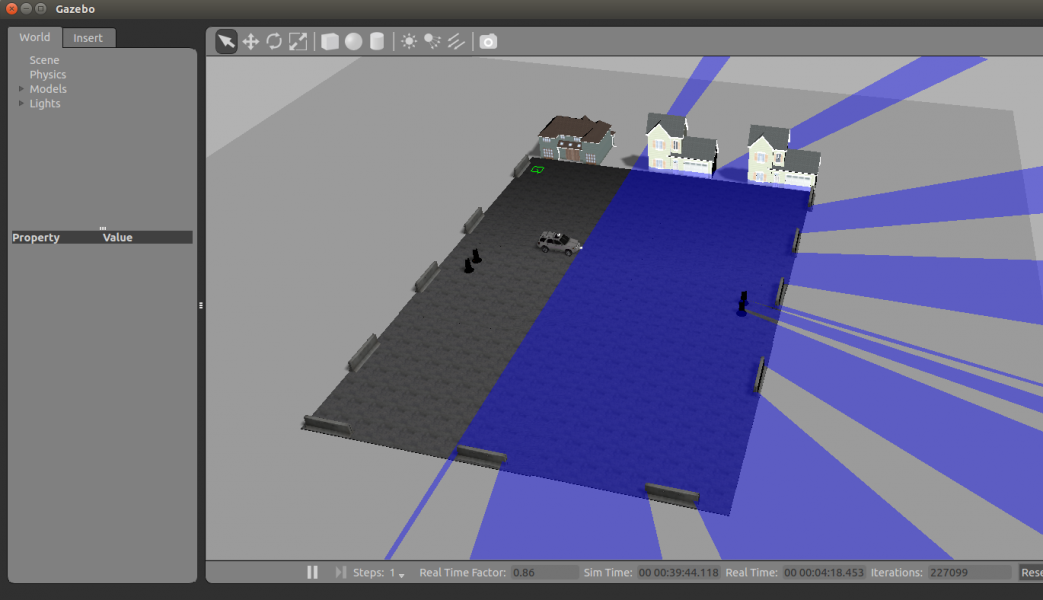
Here you can see a few cones, as well as a large array of jersey barriers, and a set of houses. These are a small-scale version of a driving space, which is meant to test to ensure that we do not run into obstacles (even if commanded to do so). That's part of a different tutorial though: the goal now is to map this terrain.
Exchange gzclient for rviz
As amazing as gazebo is for visualizing things for you, it takes away processor and, in any case, using rviz is much more interesting for the case of not knowing what your map is.
So, close gzclient, and then:
rosrun rviz rvizLoad your favorite .rviz file to get your sensor data, and then let's start up the SLAM node.
Start up hector slam
Note: hectorslam is currently not available for ROS melodic.
In order to streamline the use of slam in these tutorials, we provide a launch file that integrates the various sensors and tf contexts.
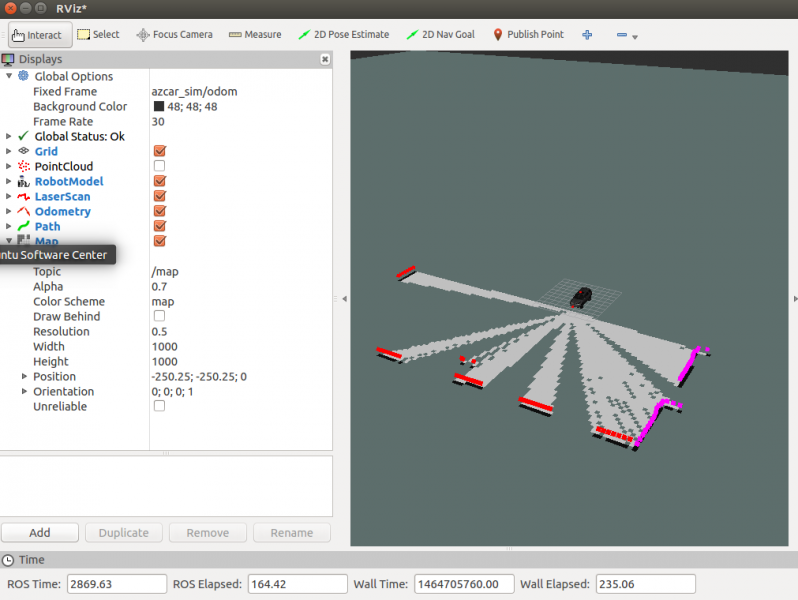
roslaunch catvehicle hectorslam.launchNow, back in rviz, apply Displays->Add->By Topic->/map
You should now see the beginning of your map, as determined by hector slam.
Move around
Use your favorite way to move around (i.e., run the joystick tutorial, or execute the hard left turn script), and you should see the map form before your eyes in rviz. I will run the hard left turn, since that is likely to be easier if you don't have a joystick.
cd src/catvehicle/src/tests/openloop
./hardLeft.sh
After this completes, the map looks much more fully formed:
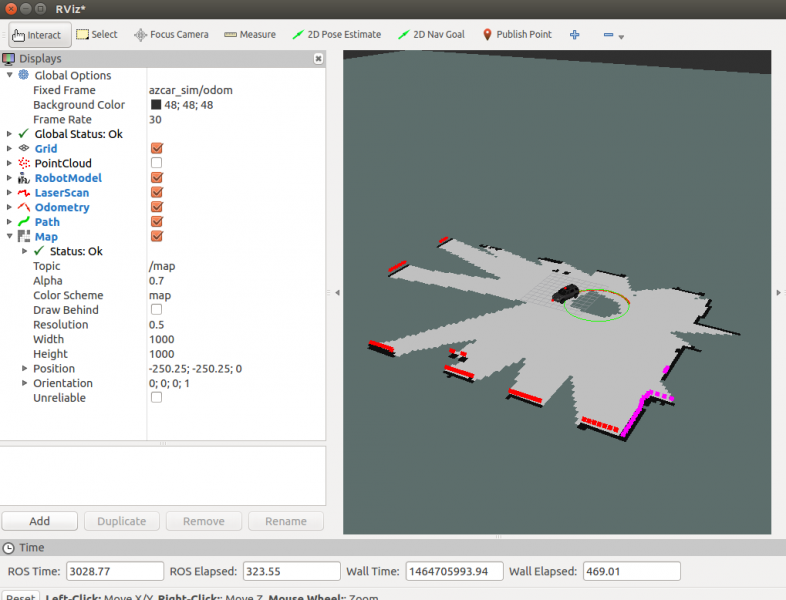
It is worth noting, however, that SLAM only fills in the map if it gets a ray trace from the laser through that area that has a return value that is not the 'max' value for the laser. So, in this case, we see lots of gray space still in the map, which means that we would have to explore from different angles to ensure that there is nothing there.
Your location in the map
In gazebo, we get reliable odometry from the simulator, but in the physical platform, such odometry has significant amounts of noise. The pose, as estimated by slam, gives you the position from the map's frame of reference. To see this, let's use rostopic.
$ rostopic echo -n 1 /slam_out_pose
header:
  seq: 2575
  stamp:
    secs: 3202
    nsecs: 214000000
  frame_id: map
pose:
  position:
    x: 0.987518310547
    y: -0.0760498046875
    z: 0.0
  orientation:
    x: 0.0
    y: 0.0
    z: -0.185094345643
    w: 0.98272075546
---
The /slam_out_pose topic is the estimate of hector slam of your current pose in the reference frame of the map. You can see that from the fact that the header's frame_id is "map". If you want to visualize the pose as part of your rviz, just add it to the display. You can also substitute the laser's point cloud for the one inferred by slam---this could be useful if you decide to add more sensors to a robot, and you'd like to see them all from the perspective of the robot.